1. Log in to the Mosaic Analytics Inventory Console.
https://backoffice-console.mosaic-pos.com/
2. Click on the 3-lines to display the side-panel menu.
3. On the side-panel menu, click on "Inventory".
4. Select "My Inventory".
5. Select "Inventory Categories".
6. Click "Add Category".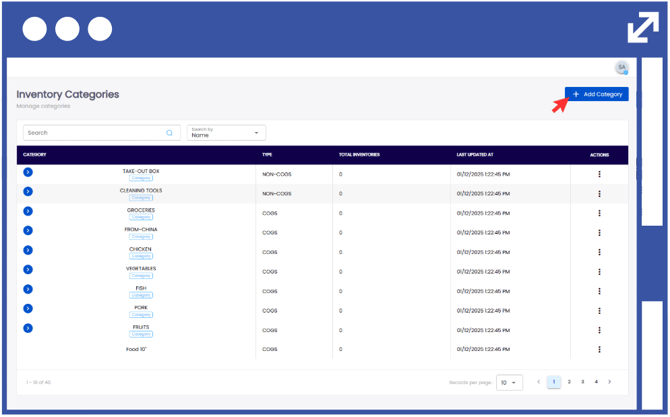
Note: You can click on the minimize button to reduce the size of the window.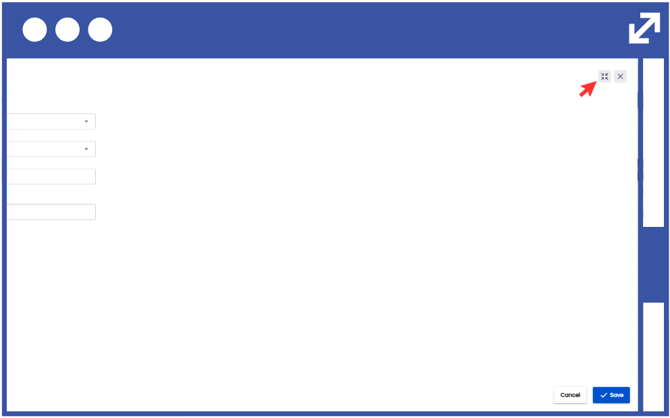
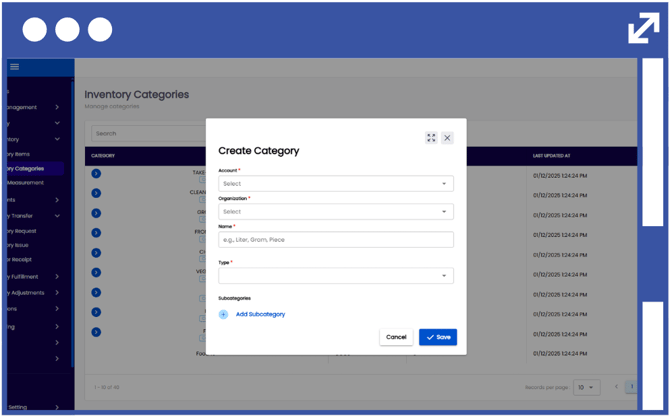
7. Select the "Account Name" and "Organization" from the drop-down list.
8. Input the desired "Category Name"
(e.g., Food, Beverage, Dessert)
9. Select the "Service Type" as either COGS or Non-COGS
COGS: Cost of Goods Sold (Inventory items)
Non-COGS: Non- Cost of Goods Sold (Packaging, Equipment, Assets)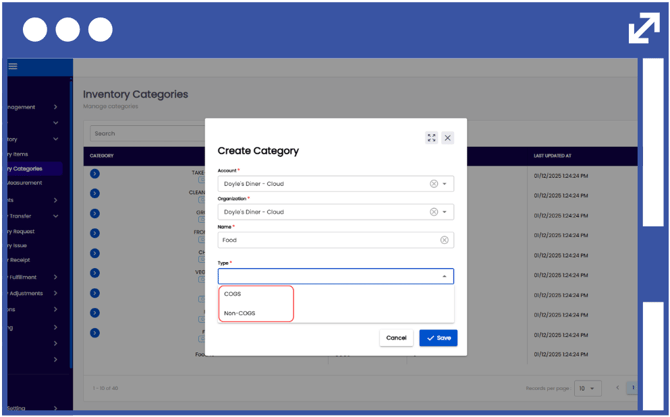
10. Input subcategories by clicking on the "Add Subcategory" button.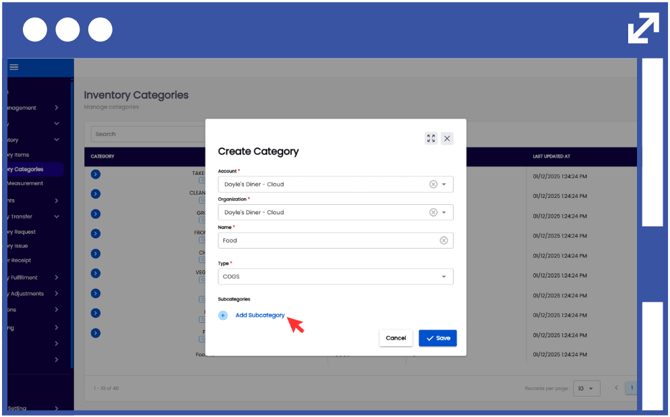
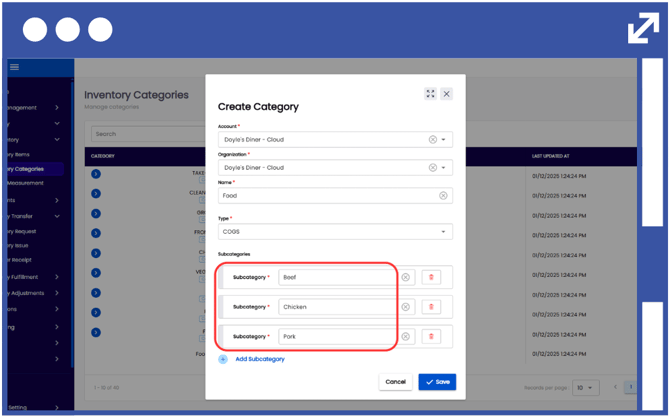
11. Once you have created a subcategory, you can add more options by clicking on the "Add Subcategory" button.
Note: We highly recommend creating a subcategory as this will be a required field when creating an inventory item.
12. Click "Save".
13. In order to modify the inventory category, click on the action button using the three-dots.
14. Select "Edit" to modify the desired inventory category.
15. Input the changes required. To remove a subcategory option, simply click on the delete button. 
16. Click "Save".
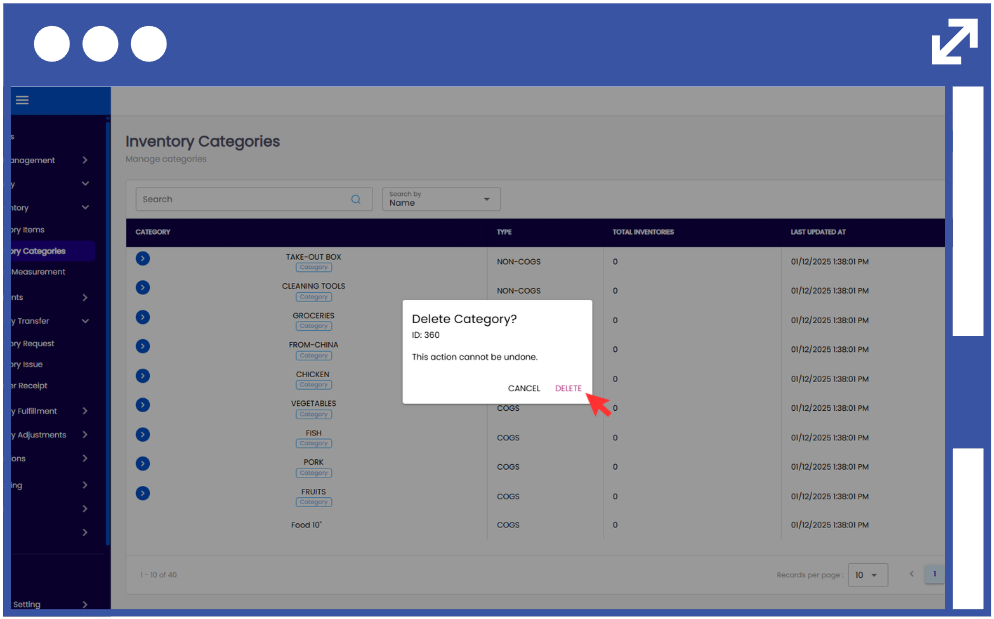
17. To delete an existing item category, select "Delete".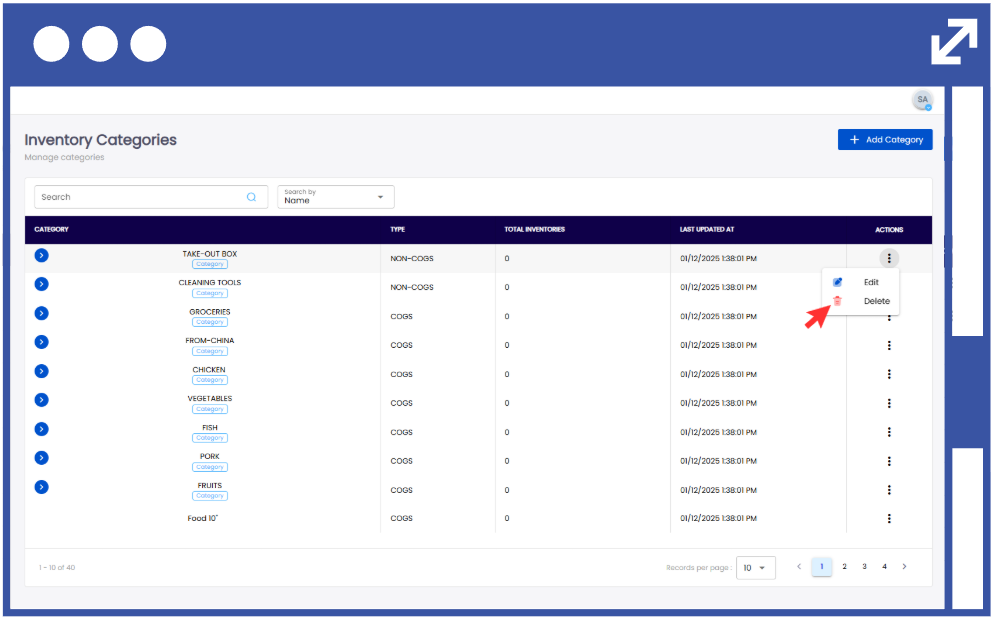
18. When deleting an item, ensure that the selected inventory category corresponds to the Unit ID before clicking “Delete.”