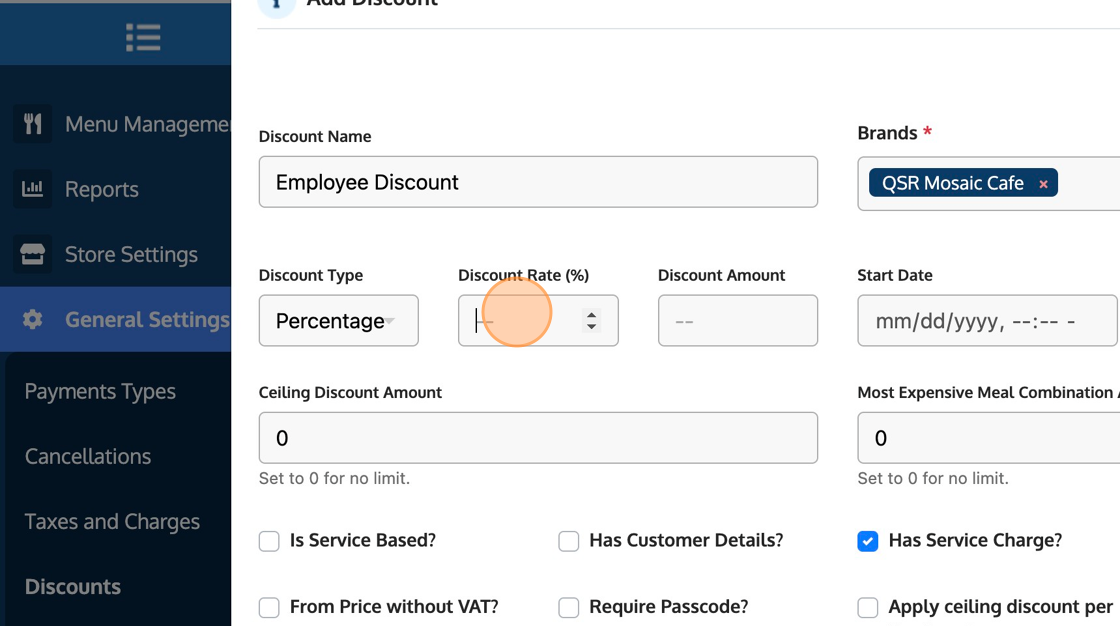
Setting up discounts is quick and easy by heading over to Mosaic POS Back office > General Settings > Discounts. Steps in this article will guide users on how to create discounts (with an example on creating an Employee Discount).
1. Navigate and login to your Mosaic POS Back Office https://admin.mosaic-pos.com
Pumunta at mag login sa inyong Mosaic POS Back Office https://admin.mosaic-pos.com
2. Click "General Settings"
Pindutin ang "General Settings"

3. Click "Discounts"
Piliin ang "Discounts"

4. To start setting up a discount with a maximum/ceiling value, click "Add Discount"
Para makapag setup ng discount na may maximum/ceiling value, piliin ang "Add Discount"

5. Enter all required information. You may use this as reference:

6. Choosing the Discount Type is important.
Importante na piliin ang gagamitin na Discount Type.
By Percentage - will apply a % discount to the transaction.
By Amount - will apply a fixed Peso amount discount to the transaction.
If you have chosen Percentage, then you only need to input the Discount Rate (%) and leave the amount blank; and vice versa.
Kung ang gagamitin na discount ay Percentage, kailangan lang ilagay ang Discount Rate (%) at laktawan ang Amount; kabaliktaran naman nung ang gagamitin ay ang Amount.

7. "Has Customer Details?" will require the cashier to ask for identification so that the business may input the customer details onto the transaction.
"Has Customer Details?" kailangan ilista ng cashier ang detalye ng ID ng customer para makapag tuloy sa transaction.

8. "Require Passcode?" will require the authorization from an onsite manager/supervisor to complete the transaction.
"Require Passcode?" kailangan ng authorization mula sa onsite manager/supervisor para makumpleto ang transaction.

9. Click "Save" when finished.
Pindutin ang "Save" .

.png?height=120&name=Mosaic%20Full%20Logo%20Blue%20(Transparent).png)