To create a purchase receipt, go to Purchasing > Purchase Receipt > Receive
Overview
Creating Purchase Receipts can be performed in 2 possible ways. The first is to inspect an approved Purchase Order then creating a receipt from there. The second way is to go to Purchase Receipts and locate an approved Purchase Order and approving from that module. This way, users have options depending on which is most convenient.
Creating a Receipt from an Approved Purchase Order (Short-method)
1. Navigate and login to https://app.restoiq.com/
2. Go to "Purchasing".

3. Click "Purchase orders".

4. Locate the Purchase Order you are receiving, then click the Ellipsis (three-vertical dots) icon.

5. Select View.

6. Click "Create Receipt".

7. Enter the invoice number (this can be the Delivery Receipt "DR" reference number)

8. Enter the date when the location received the goods.

9. Optional: Users may upload a scanned copy of the Delivery Receipt to help with auditing or future recall.

10. Optional: Users may enter notes to help audit and/or future recall.

11. Click "Create"

Creating a Purchase Receipt via "Purchase Receipts" (Long-method)
1. Navigate and login to https://app.restoiq.com/
2. Go to "Purchasing".

3. Click "Purchase receipt".

4. Click "Receive".

5. Once the window loads, select the supplier.

Alert: If you are going to "receive" an existing Purchase Order, you must enter the same Supplier in step 5, otherwise Resto iQ will not be able to recall the said Purchase Order.
6. Select the location where the goods are received.

7. Enter the Supplier's Invoice Number. This can be identical to the Delivery Receipt reference number.

8. Users may opt to upload the DR on the "DR Upload" section and/or enter a note to help audit or future recall.

9. When "receiving" an existing Purchase Order, users must click "Add Purchase Order".
Otherwise, users may just click "Add Item" and proceed to listing the items one-by-one. Please be advised that this is not the most ideal way of procuring as it bypasses the standard process.

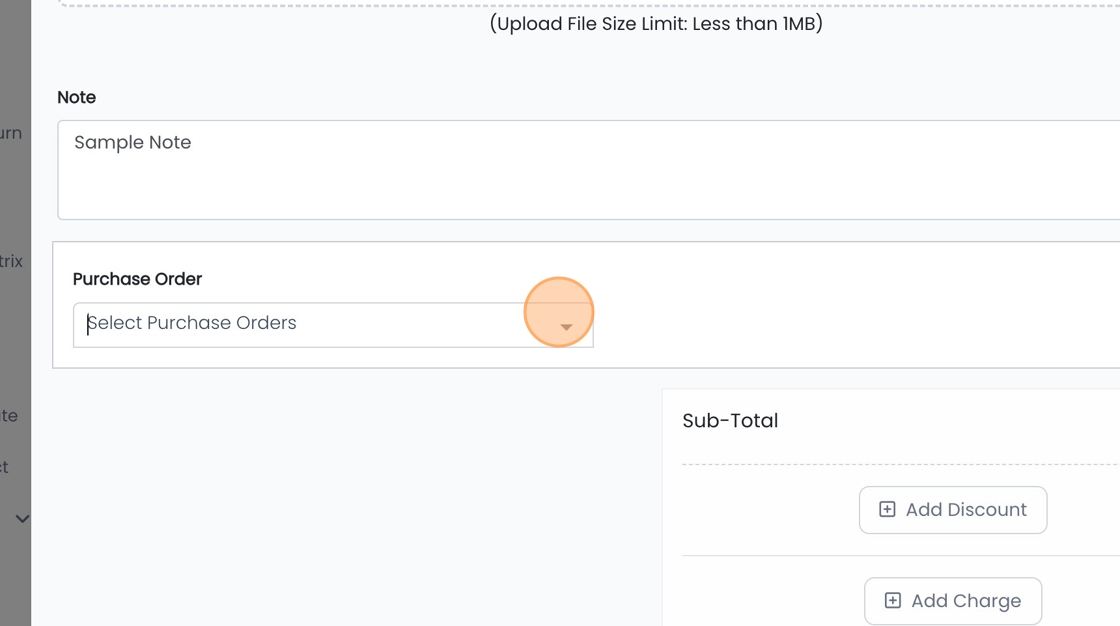
10. Select the dropdown list.

11. Resto iQ will recall all available and approved Purchase Orders relative to the Supplier selected.

Alert: Changing suppliers will also change what Resto iQ can recall from the dropdown list shown in Step 11.
12. As you can see this is automatically populated, no need for manual entry.

13. When satisfied, click "Create".

.png?height=120&name=Mosaic%20Full%20Logo%20Blue%20(Transparent).png)