The Product Inventory page allows you to monitor and manage stock levels for each product variant. You can search by product title, apply filters, perform bulk updates and view inventory logs. The key metrics displayed are Sold, Pending, Remaining, and Max Stock — where Max Stock = Sold + Pending + Remaining. This formula ensures you have a complete view of total inventory capacity, helping you track sales velocity, fulfill pending orders, and avoid overselling.
Note:
- Configuring the inventory is not for events with assigned seats.
- The inventory page is directly connected to the Product List. Check this by:
- Go to Product List and click the vertical ellipsis (⋮ ) of any product

- Click “Manage Inventory”
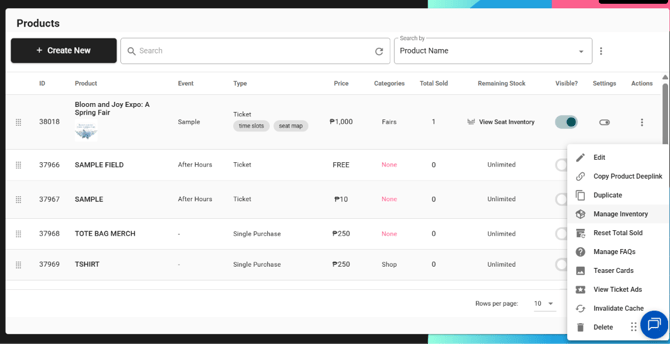
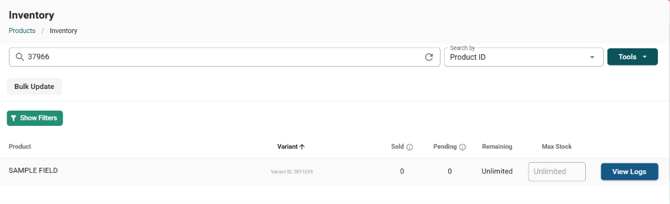
- You will be redirected to the Inventory, specifically the specific product that you selected showcasing its Product ID in the search field.
- Go to Product List and click the vertical ellipsis (⋮ ) of any product
Configure your product inventory by following these steps:
1. View the interface > Set the Max Stock to the total number of stocks of the specific variant of your product/ticket > Click Save.
Note: The Max Stock is any number as long as it is NOT less than Sold + Pending.

2. Click “View Logs” to check the changes done in the inventory of your product variant.
Note: Changes can be from:
- Internal: Administrative adjustments (manually updating stocks on this control panel)
- External: Customers buying tickets/products or placing refunds/cancellations

3. To perform a bulk update of multiple product variants,
- Click “Bulk Update”.

- Select the product variants you want to update > Click “Bulk Update” beside the x button.

- Set the Max Stock to a specific number or make it unlimited by turning on the toggle > Click “Save” .

- See the bulk update reflected on the interface.

4. To view your inventory in different ways, click “Show Filters”, based on:
- Archived Variants: For sold out tickets/products
- Event Name
- Date
- Product Name
- Start Time and End Time

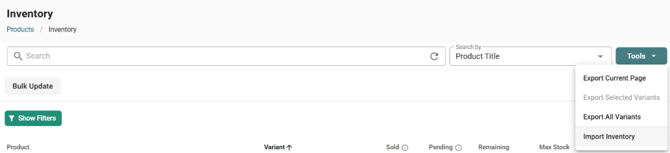
5. (Optional) Use the Tools function to import and export inventory data.
- Click “Tools”


- Export the data in Excel in the form of:
- Current (Inventory) Page
- Selected Variants
- All Variants
- You can encode the data updates in the “New Max Stock” column in the Excel sheets
- Sample Excel File of Current Page

- Sample Excel File of Selected Variants

-
Sample Excel File of All Variants

- Sample Excel File of Current Page
- Import the updates done in the exported file to reflect the changes in data. In this example, we will import the updates for Selected Variants.
- Click “Import Inventory”.
- Click “Import”.

- Upload the file.

- See the changes automatically reflected under Max Stock.

- Click “Import Inventory”.