.png?width=201&height=50&name=HP_TICKETING%20SOLUTIONS_LOGO-BLACKDSFAS%20(1).png)
1. How do you tag a ticket as Coming Soon?
2. How do you tag a ticket as Sold Out?
3. How do you configure Add-Ons?
4. How do you open more slots for guests?
5. How do you do a pre-sale for customers?
6. How do you create a wait-list product?
7. How do you collect custom information from your customers?
8. How can I redirect customers to the HelixPay checkout page without using the entire storefront?
How do you tag a ticket as Coming Soon?
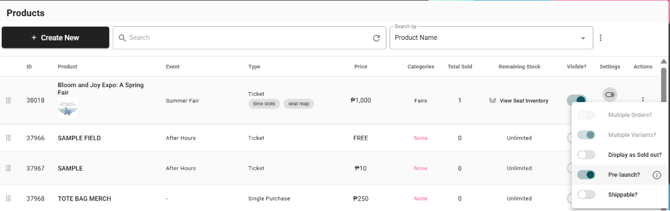
1. Go to Products List.
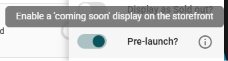
2. Under Settings > Toggle on Pre-Launch.
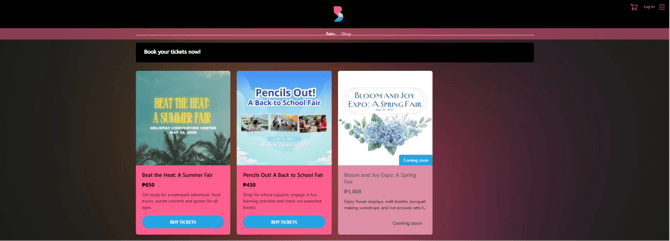
3. Check the storefront and see that your event is coming soon.
How do you tag a ticket as Sold Out?
1. Go to Products List.
2. Under Settings > Display as Sold Out.
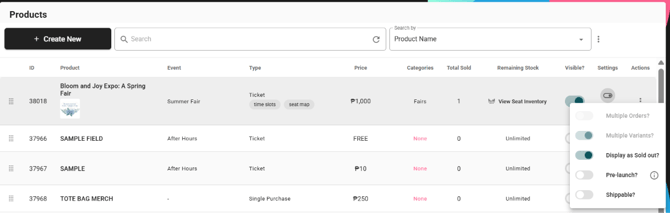
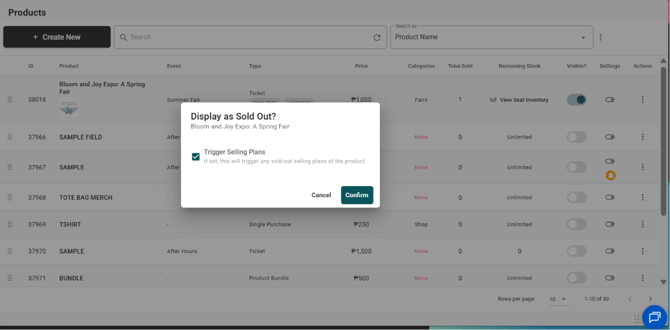
3. (Optional) Enable Selling Plans, which entail the next event to be displayed and promoted after the current event is sold out.
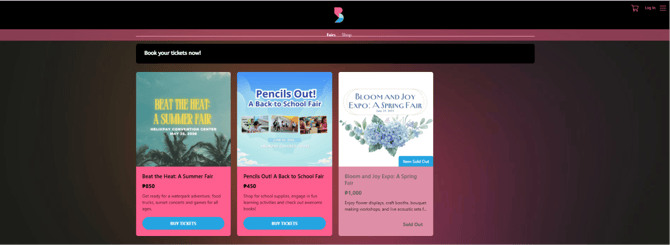
4. Check the storefront and see that your event is sold out.
How do you configure Add-Ons?
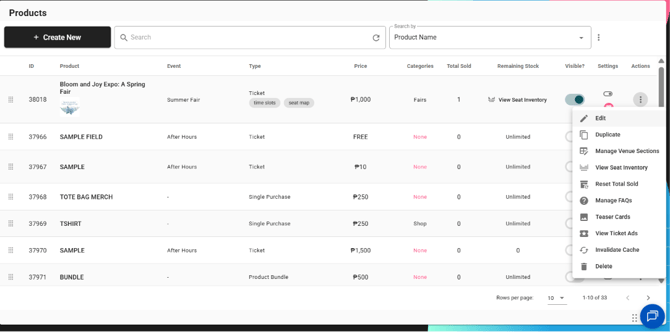
1. Go to Products List > Click the vertical ellipsis (⋮ ) under Actions > Click ✐ Edit.
2. Click “+Add-on Products” > Select which products will serve as an add-on to your main product.
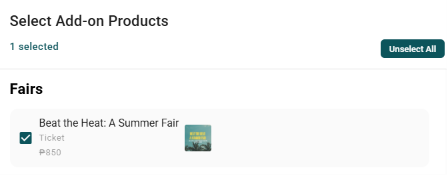
Note: If the main product is a ticket product, the add-ons are configured on a per-ticket basis. For example, your add-on is a shirt, and your customer bought 2 tickets. You can configure the add-on to the first ticket only.
How do you open more slots for guests?
1. Go to Products > Inventory.
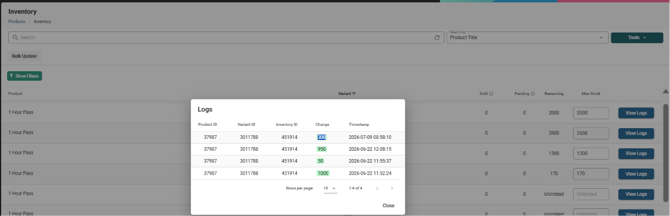
2. In this example, the current Max Stock is 1700 slots.

3. Increase the Max Stock to your desired amount. In this example, we are increasing it by 300. Therefore, the Max Stock will be 2000.

4. Click ‘View Logs’ to see the increase update.
5. For more information on how to manage inventory, check out this guide.
How do you do a pre-sale for customers?
There are 2 ways:
Enable Password Protection on Your Storefront
- Go to Design > Password Protection.
- Toggle on “Enable Password Protection”
- Encode your password under the “Password” field.
- Provide the password to the customers who will participate in the pre-sale, and this is what they will use to buy tickets/products from your storefront.
Enable Exclusive Access for Select Customers
Usually applied for those existing customers who previously bought tickets/products from your storefront before
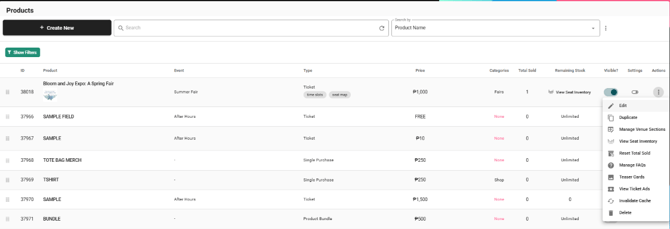
- Go to Products > Product List > Select Event > Edit.
In this example, we are selecting Bloom and Joy Expo: A Spring Fair.
- Go to “Set Exclusive Access” > Click “Select Products”.

- Select the product that is associated with the event / product that has an exclusive access.. In this example, we have selected T-Shirt.
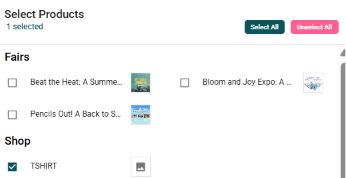
This means that if a customer bought a T-Shirt, they have exclusive access to buy a ticket for the Bloom and Joy Expo: A Spring Fair. - See the exclusive access for the product reflected.

How do you create a wait-list product?
This is for events that require wait-lists. A wait-list product is marked as free. This is what customers “purchase” first before being able to buy the actual ticket for an event or an exclusive product.
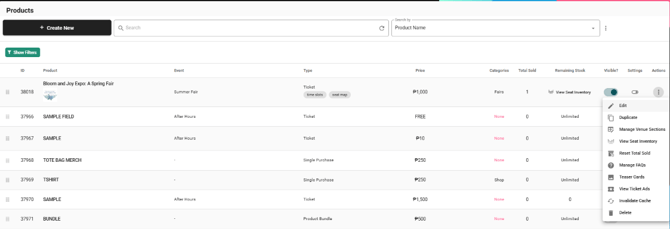
1. Go to Products > Product List > +Create New.

2. Select the Product Type.
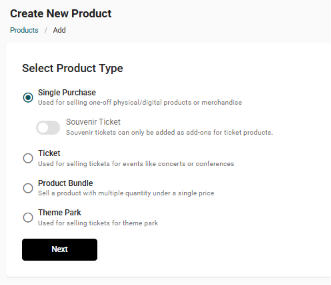
3. Configure the details for the wait-list product.

4. Go to Products > Product List > Select Event that has a wait-list > Edit.
In this example, it’s the Bloom and Joy: A Spring Fair Expo.
5. Go to “Set Exclusive Access” > Click “Select Products”.

6. Select the wait-list product so that customer can buy from the event after registering in the wait-list (i.e. purchasing the wait-list product).
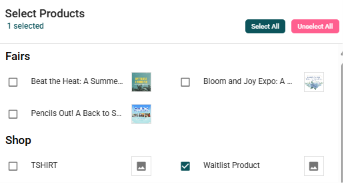
7. See the wait-list reflected.

How do you collect custom information from your customers?
Configure this if you want information per attendee.
Option 1: Through Attendee Settings
1. Go to Products > Product List > Select Event / Product > Edit.
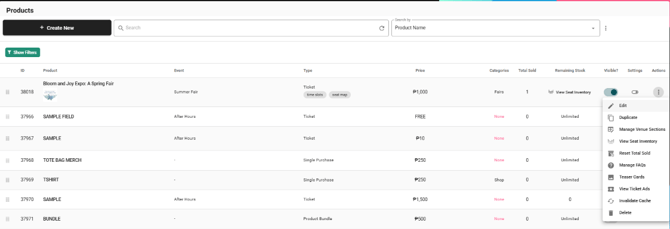
2. Go to Attendee Settings > Toggle on “Attendee Name Fields” and “Attendee Name Required”.

3. (Optional) Add applicable Attendee Properties (information fields other than attendee name). Check this guide on how to set up Attendee Properties.

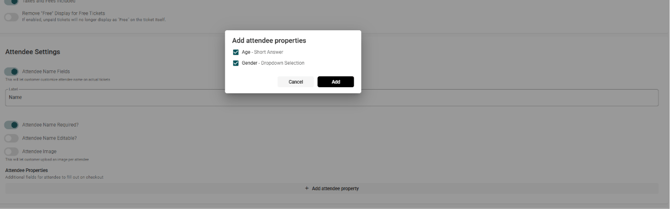
Option 2: Through Checkout Fields Procedure
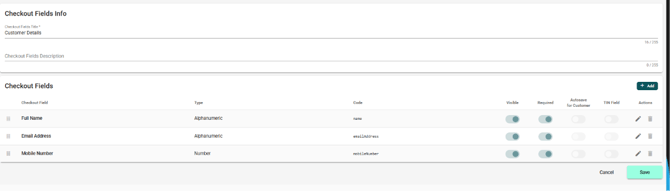
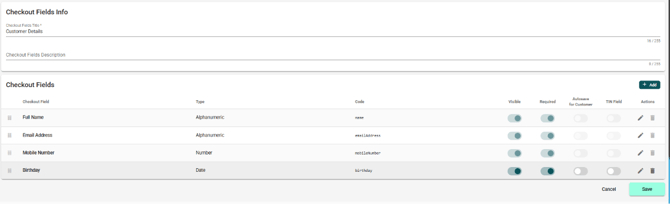
1. Go to Store Settings > Checkout Fields > Click +Create New.

2. Encode the details for the Checkout Fields Info > Click +Add to add a checkout field.
3. Encode the title and data type.
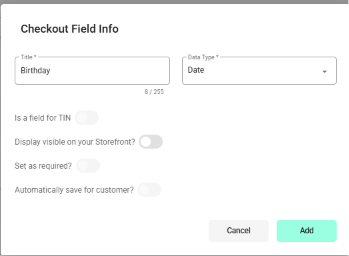
4. See the checkout field info reflected.
I have a main website. Can I redirect customers to the HelixPay checkout page without using the entire storefront?
Yes. Each page on the HelixPay storefront has its own link.
If you want to redirect your customer straight to the checkout page of a specific product/event, you can extract the product page links from the Product List tab.
Option 1: Using the HelixPay console
1. Go to Products > Product List > Select Event/Product > Edit.
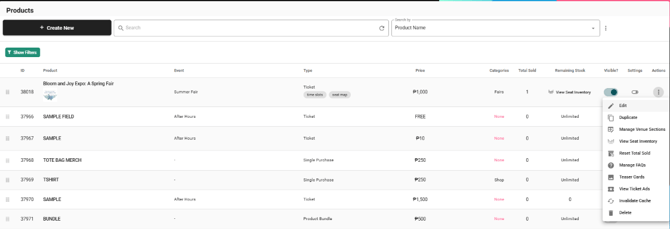
2. Go to Advanced Settings > Retrieve the link from the Product URL section > Send to customer.

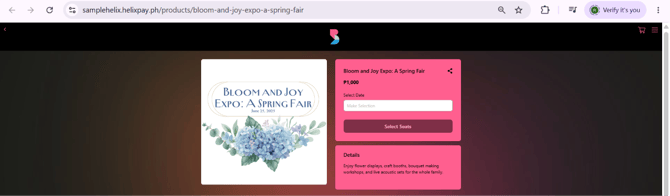
On the end of your customer, they will see the checkout page:
Option 2: Using the storefront
Alternatively, you can also just visit your storefront and extract the links as you view each product page.
1. Navigate your storefront > Event/Product > Click Buy Tickets.
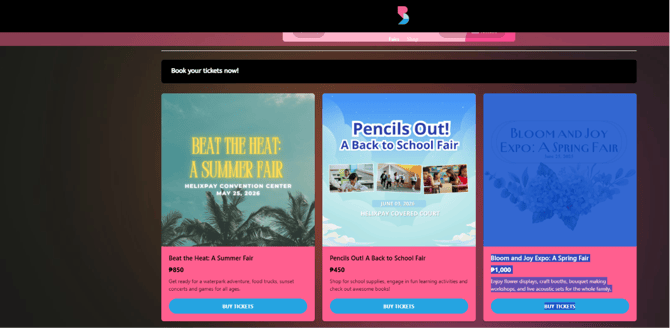
2. Retrieve the link above > Send to customer.